8.30.2011

A totally new look that didn’t break the bank

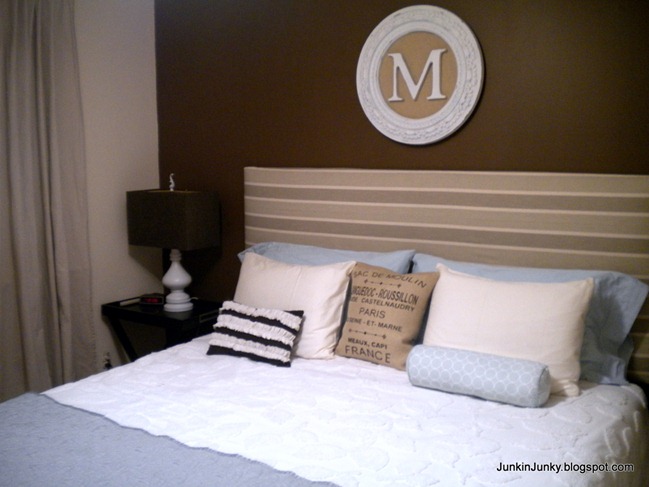
The purchase of a $5 piece of fabric was the impetus to make this change to my bedroom. I liked the natural colours in the stripes and used it to recover my headboard.

The headboard is made from two canvases. In the past when I recovered them, I did each one individually, but this time the fabric was wide enough to cover both so they look like one.

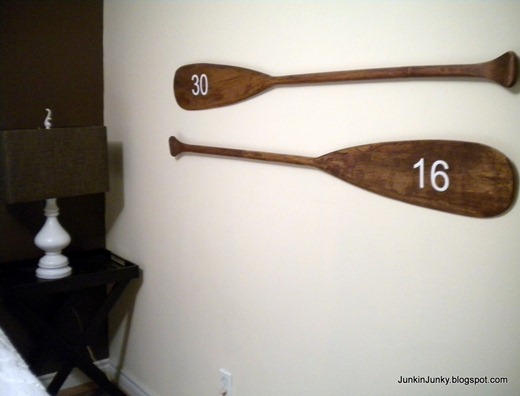
$6 for the canoe paddles, which I added my children’s birth dates to. Stuff gathered from around the house, a newly covered ottoman and a couple of cushions later, and my room is now ready for fall nesting.

Canvas frame headboard www.junkinjunky.blogspot.com
Canvas frame headboard www.junkinjunky.blogspot.comDSCN2538-1

It is a bit of a tight fit, but I’m not ready to give up my king size bed, ever :)

Because I kept the wall colours neutral, making a change to this room is easy. Here are some other looks achieved by changing the bedding and accessories.

Canvas frame headboard www.junkinjunky.blogspot.com

Canvas frame headboard www.junkinjunky.blogspot.com
Sharing at the following parties. Please pay them a visit and be ready to pin ;)

Transformation Thursday

8.29.2011

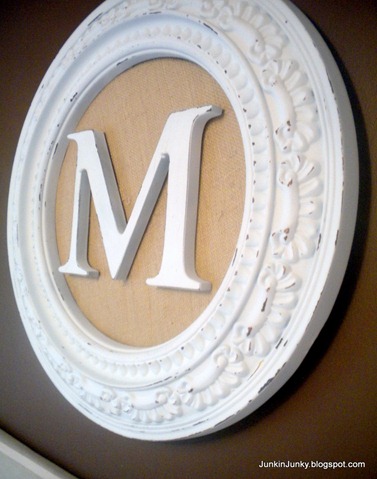
Framed monogram

Another project completed for my bedroom update.

I used an old frame that used to be a clock, some burlap and a letter. I gave them a few quick coats of white spray paint and put it together. I sanded it to expose the darker colour underneath in spots.
I’ve recovered my headboard and am getting closer to the reveal :)


Framed Monogram at JunkinJunky.blogspot.com

Framed Monogram at JunkinJunky.blogspot.com 
Sharing at the following parties. Please pay them a visit and be ready to pin ;)

Burlap Party at My Uncommon Slice of suburbia

Transformation Thursday

8.28.2011

Pleats and ruffles

Another change is coming to my bedroom. Because the wall colours are neutral, I have been able to modify the look easily.

A friend made me a pleater tool quite a while ago, and I’m just now getting to use it. That along with the easy method of making ruffles, made this ottoman update easy, although it was time consuming.

DSCN2486

I used a drop cloth and only barely bleached it as I wanted to keep the natural colour.

This is my first time making pleats and thanks to the pleater tool it was easy.

DSCN2488

I was originally going to add a contrasting trim where the pleats join the cover, but trim is expensive and I’m cheap poor :) Turns out I like the ruffles.

DSCN2487

I’ve been really busy lately. I golfed this week, for the first time in 20 years! I’ve also been working my entertainment business on the weekends, so there is little time for junking or crafting.

Hopefully I can get to some of the updates to my bedroom this week. Stay tuned :)

Sharing at the following parties. Please pay them a visit and be ready to pin ;)


The DIY Show Off

8.22.2011

Sac de Moulin cushion

Since I made a stencil for the Ballard Designs knock off cube, it was easy to make a cushion using the same design.

DSCN2470

Now they are a pair :)

DSCN2469I used two different sources for the burlap, so the shades are a little off, but you would have to inspect closely to tell in person.

There were a ton of people that asked me to send them my svg’s for the rustic herb crates as well as the Paris Flower Market. I hope that if you make something from the files, that you will share it with me :)

8.21.2011

My recent thrifty finds

I haven’t shown you my thrifty finds recently. So here we go…

I bought this for $50 with the intention of restaining the top and painting the bottom, to match my coffee table, but it’s just going to be too much work. I’m reselling it if anyone local is interested.

Buffet

Two of these lampshades for $6 each, with the price tags still on them. I thought they were a nice change from my drum shades. The lining is made of gold fabric, quite pretty with the light on.

DSCN2443

This Bombay Co mantle clock is in perfect condition and only $10.

DSCN2442 

Have you found any good “junk” lately?

8.20.2011

Framed brooch

After a long search, I finally found a brooch at the thrift store. Popped it into a simple frame and now have to find somewhere to hang it.

DSCN2425

It was a really nice day today, one of those days that you are thankful for.

I worked at an event doing facepainting and my daughter came to work with me. You know 13 year olds, it’s not easy to get to spend time with them, so I will take it any way I can.

DSCN2418

This little girl was so precious. After I finished painting her face and showed her how she looked in the mirror, she was in awe and I think a little shocked; so sweet.

DSCN2420

Ruffled cushion and some new fabric

I put the ruffle instructions to use this morning and quickly whipped up this cushion cover.  It worked like a charm.

DSCN2415

While out at the thrift store the other day, I found 4 metres of this heavy weight cotton fabric, for $5!  I haven’t figured out what I will make with it yet, but it looks perfect with my zebra stripe fabric that I bought from Tonic Living a while back.

DSCN2416

8.18.2011

The easiest way EVER to make ruffles

I’ve wanted to make something with ruffles for ever, but the methods I had tried were labourious and frustrating.

While on Pinterest (instead of doing what I should have been doing), I found a link to an incredible blog that shows us just how easy it is to make ruffles.

DSCN2405

I used a piece of drop cloth for this example.

Set your stitch length to it’s longest setting, in my case it’s 4

DSCN2401 
Set your tension to it’s lowest setting

DSCN2400

I’m sorry, I only have two hands so couldn’t show you this part, but you just hold the thread where it comes off of the spool. The tighter you hold the thread the tighter the ruffles, the looser you hold the thread the looser the ruffles.

Here it is as I sewed (notice paint on hands? I was multi-tasking lol)

DSCN2402

I also tried it on a wider piece of fabric and it worked just as well.

DSCN2407

If your tension happens to slip, don’t worry, you can move the ruffles along the threads. Just don’t pull too tightly.

I hope that this helps you too. Now I can’t wait to do something with ruffles :)

Sharing at

Transformation Thursday Button

8.16.2011

Flip Flop refashion

While out junkin the other day, I found four pair of Havaianas’ for $3 a pair. They are comfy, but I wanted less of the flip/flop happening.   I used the tutorial found at make it and love it. I left mine fairly simple as I’m not much into bling. You have got to try this, especially while flip flops can be found so cheap at this time of year.

DSCN2386 DSCN2388

8.15.2011

Another savings bank

A friend asked me to make a savings bank for her daughter after seeing the one I made for my daughter.  I searched every thrift store I could find for a similar shadow box, but to no avail.
This is what I was able to come up with. It’s not a shadow box, but it is perfect as a bank.
DSCN2376
It started out with hideous faux leather, which I promptly removed. Then I removed the latch and hinges at the back.
DSCN2365
Fortunately I was able to use the pieces as a template for the new cover, making it easy for me.
DSCN2366 DSCN2368
I choose this paper as I thought it went well with the latch and hinges. I glued it on and used an emery board to lightly sand the edges. Total cost $2.25.
I didn’t drill a hole for the coins since it has a latch. She can place photos of items she is saving for and the clear window at the front will remind her of all the money she has been able to save (hopefully).
DSCN2378
DSCN2379

P.S. That’s the top of my coffee table that I made over. Love the colour of American walnut.

Sharing at